Sunday, September 29, 2019

KAEDAH PEMASANGAN CCTV | CCTV AMPANG | CCTV BUDGET | CCTV MURAH | CCTV | CCTV MALAYSIA |

KAEDAH PEMASANGAN CCTV 


1. Tentukan kabel yang sesuai

Dalam projek amali ini, kabel CCTV yang digunakan adalah jenis  coaxial cable RG59/6 series. Ini merupakan kabel standard yang sering digunakan untuk penyambungan antara kamera CCTV dan DVR. 

Manakala penyambung yang digunakan adalah jenis BNC connector. Ia menyambungkan antara panel video pada DVR dan kamera jenis Dome.


2. Tentukan lokasi dan area pantauan CCTV

Lokasi pemasangan CCTV ditentukan berdasarkan jarak pandangan yang hendak dikawal samada jauh atau dekat dan apakah untuk keadaan gelap atau terang. Penetapan lokasi amat penting bagi mendapatkan titik fokus kawasan yang hendak di kawal.


3. Penetapan Kedudukan kamera CCTV

Terutama untuk pemasangan CCTV di rumah, perletakkan sudut kamera CCTV di bawah tempat berbumbung boleh melindungi kamera CCTV anda dari hujan, angin, dan sebagainya. Selain itu, penempatan di bawah bumbung juga biasanya memberikan paparan yang lebih baik dan mudah untuk menarik kabel jaringan. 

Dalam projek amali ini, kamera jenis Dome infrared digunakan. Ia boleh menghasilkan gambar yang terang walau pun pada waktu malam atau dalam suasana yang gelap.


4. Proses Menarik Kabel (Lay-out cabel)

Setelah menentukan titik pemasangan CCTV, berikutnya adalah mencari titik masuk untuk menarik kabel RG59/6 dari luar ke dalam melalui atas siling atau laluan conduit dan sebagainya. Pada kebiasaannya pada ruang pejabat lebih praktikal menarik kabel dilakukan melalui atas siling. Ia nampak lebih kemas dan tersusun

DVR yang digunakan mempunyai panel untuk bekalan kuasa secara berasingan. Oleh itu kabel untuk bekalan kuasa kamera CCTV perlu disambungkan kepada punca bekalan yang terhampir dengan lokasi kamera tersebut.


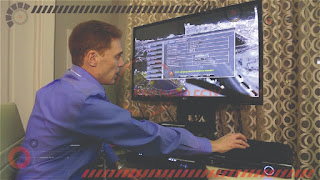
5. Penempatan Monitor dan DVR

Monitor dan DVR adalah peralatan  yang melengkapi sistem CCTV anda. Tentukan tempat dimana monitor dan DVR akan diletakkan secara bersebelahan bagi memudahkan proses ‘setting’ (biasanya pengguna akan merujuk kepada buku manual yang disediakan oleh pihak pembekal DVR). Untuk keselamatan ada baiknya set DVR diletakkan secara tersembunyi terutama di rumah kediaman bagi mengelakkan penceroboh merosakkan atau mengambil set DVR.


6. Lay-out kabel & 'Setting'

Setelah mendapatkan posisi perletakkan kamera CCTV dan lokasi penempatan monitor serta DVR, maka berikutnya adalah proses terakhir iaitu menarik kabel RG59 yang menghubungkan antara CCTV dengan monitor dan DVR. Maka lengkaplah proses pemasangan set CCTV di rumah kediaman atau di bangunan pejabat. Setelah set CCTV selesai di pasang dan boleh disambung bekalan kuasa, maka proses 'setting' DVR merujuk kepada manual yang disertakan dapat dilakukan.


Semoga tips sederhana ini boleh menjadi rujukan buat anda yang hendak membeli pakej kamera cctv.

Untuk anda yang ingin mendapatkan perkhidmatan dari PRO HERO CCTV. Anda boleh menghubungi seperti yang di bawah:-

0⃣1⃣0⃣2⃣6⃣3⃣0⃣0⃣5⃣0⃣


TROUBLESHOOTING A CCTV CAMERA WITH NO PICTURE | CCTV AMPANG | CCTV BUDGET | CCTV MURAH |

Troubleshooting a CCTV Camera with No Picture


At CCTV Camera Pros, we regularly hear from people that need help saying “my CCTV camera is not working”. Here is a guide for CCTV troubleshooting no picture issues.
The guide is used for hard wired security cameras that use BNC connectors and coax cable. It applies to analog CCTV cameras and HD coax security cameras.


Test Your Power Supply
Before you go through the trouble and expense of buying a test monitor or a spare CCTV cable, I recommend that you check to make sure that you do not have a power supply problem. Many CCTV systems include individual DC power transformers for each camera (like the one in the above image). If you do not have a spare, you can find security camera power supplies here.
Be sure to look at your existing power supply to confirm whether it is 12V DC or 24VAC. Most are 12V DC.
Disconnect your existing power supply from the cable and attach your spare. Plug it in and test to see if you camera now displays video.


Check Power Supply Box Fuses

If your security camera system uses a CCTV power supply box, I recommend that you check the fuses inside the box. The above image shows the inside of two CCTV power supply boxes. The one on the left uses traditional one time use fuses. The one on the right uses PTC “auto reset fuses”. Both types have an on / off switch the control power to the entire unit.
Follow these steps to troubleshoot your power supply box.
  1. Make sure that the the power switch is turned on and the LED status lights are on.
  2. If your power supply box uses traditional fuses, confirm that none of the fuses are burnt out. If one is burnt out, the LED light under that particular fuse will be off. You should replace the fuse.
  3. If your power supply box uses PTCs, instead of fuses, confirm that the LED light are on for all channels. If they are not, you may have a short circuit somewhere. Disconnect each camera one at a time to see which one is causing the problem.
  4. Confirm that the wire power connections are securely in place and have not become loose or disconnected.

Test Camera on a Different DVR Port
This is uncommon, but it is possible that one of the BNC video input ports on your DVR went bad. It is a simple thing to test, so you may as well give it a try before you spend time on the other troubleshooting steps.

Simply disconnect the BNC video connector of the troubled surveillance camera from the back of your digital video recorder and plug it into one of the ports where a working camera is plugged in. Plug the BNC connector of the camera that is working into the port of the camera that is not working. Does the working camera show video on the other BNC port? Does the troubled camera display video on the other port?

If the troubled camera works and the camera that was working does not work, then you have a bad input port on your DVR.


Use a Test Monitor


If you have confirmed that your power supply is working properly and that the ports on your DVR are also working properly, the next step would be to determine if you have a bad power or video cable. Using a test monitor is one way to do this.
CCTV test monitor is extremely helpful when troubleshooting camera video issues. One of the most common problems when a camera is not displaying video is a bad cable or BNC connection. Using a test monitor, you can temporarily eliminate the power and video cable that your camera is using. Many CCTV testers, like the one above, have a 12V DC power output that can be used to supply power to your camera.
Here are the steps that I recommend if you are going to use a test monitor to troubleshoot.
  1. Disconnect the video cable from your camera and use a short RG59 BNC jumper cable to connect the video output of the camera to the BNC input of the test monitor. If your camera is already mounted and connected to a power supply, I recommend that you first only connect the camera’s video to the input of the test monitor.
  2. If you do not get a video signal, disconnect the power cable from your camera. If you have a test monitor that can supply power to your camera, connect the power output of the monitor to your camera. The MON-7HD test monitor in the above image includes a short power jumper cable used to connect your camera’s power input. You can see the cable being used above.
  3. If you are using a test monitor that does not have power output, I suggest that you use a spare CCTV camera power supply to temporarily power the camera.
  4. If you do not get any video signal after switching the video cable, power cable, and power supply, you most likely have a bad camera. If you have a spare camera, connect it to the test monitor to make sure that it is working properly, then connect it to the existing cable and power supply of the camera you are replacing.
*Important Note: if you are replacing your camera, make sure the replacement camera uses the same type of power supply before connecting it. If your previous camera used 24VAC and you connect a 12V DC camera to a 24VAC power source, it will burn the circuit board and ruin the camera.


Use a Test Cable and Spare Power Supply

If you do not have a test monitor, I recommend that you use a spare cable for testing.  These pre-made Siamese CCTV camera cables are a great choice. They allow you to run both the video and power. Using a test cable will be feasible only if your existing cable run is not longer than 165 feet – the max length that pre-made CCTV cables are made.
Here are the troubleshooting steps that I recommend if you are going to use a spare cable.
  1. Before you go through the trouble of unwinding and running a spare cable from your camera to your DVR, I recommend that you check your existing power supply.
  2. Confirm that your spare cable is long enough to reach from your camera to the DVR or monitor that it is connected to.
  3. Disconnect only the BNC video cable from your camera and attach the spare cable.
  4. Disconnect the other end of the video cable from your DVR or monitor and attach the spare cable. Test to see if there is video.
  5. If there is still no video, use the power portion of the spare cable to run the power.
  6. If still no video switch out the power supply.
  7. If there is still no video, you most likely have a bad camera.


Security Camera DVR Compatibility

If you recently purchased a new DVR or a new security camera, you should confirm that the video format(s) that they support are compatible. We find that many customers have purchased a 720p or 1080p replacement camera for their 960H DVR. This will not work. If you have an analog 960H DVR, you can only use a CCTV camera that supports analog 960H video.
Many of the latest DVRs and cameras are “hybrid” which means they support multiple surveillance video formats. The above image shows a hybrid analog CCTV / HD dome camera. Notice the small joystick that is attached to the video cable. The video output of the camera can be switched by holding the joystick up / down / left right for 5 seconds. This particular camera supports AHD, HD-TVI, HD-CVI, and analog 960H (CVBS) video formats.
If you are using a 960H type DVR that only supports analog video (CVBS), you must a hybrid camera in analog CVBS mode for it to work with your DVR.
You will most likely need to consult the owners manual of your DVR to know what video format(s) it supports. If you need help researching security camera and DVR compatibility, you can contact me via email. Please let me know the make and model of your DVR and camera.


Replacement CCTV Camera Recommendation

If you need to buy a replacement CCTV camera, I highly recommend these hybrid BNC security cameras – especially if you are using an analog 960H or D1 format CCTV DVR. These hybrid cameras support analog CCTV format and multiple HD video surveillance formats. They can be used in analog CCTV mode with your existing DVR and later switched to one of the HD video modes if you upgrade to an HD surveillance DVR.


" Your Satisfaction is Our Priority "


For those of you who want to get service from CCTV PRO HERO. You may contact as below: -

0⃣1⃣0⃣2⃣6⃣3⃣0⃣0⃣5⃣0⃣

Monday, September 16, 2019

KEBAIKAN DAN KEBURUKAN TENAGA MOD KAMERA CCTV | CCTV AMPANG | CCTV | CCTV BUDGET | CCTV MURAH

Kebaikan Dan Keburukan Tenaga Mod Kamera CCTV

Dalam projek-projek CCTV Budget, kita harus mempertimbangkan mana mod bekalan kuasa untuk kamera boleh mendapatkan gambar terbaik dan bagaimana untuk menjimatkan kos projek.
Pertama, kita perlu belajar beberapa bekalan kuasa mod kamera dalam projek-projek CCTV Ampang.


1. berpusat bekalan
Bekalan kuasa berpusat merujuk kepada berpusat pemasangan peralatan sumber di dalam Bilik kuasa dan bilik bateri, dan kuasa diagihkan kepada setiap peralatan komunikasi transformasi bersepadu.
Fungsi pemantauan berpusat
Objektif Pengurusan Pusat Data terutamanya termasuk prasarana dan infrastruktur dua bahagian, seperti bekalan elektrik, peralatan rangkaian, Keselamatan dan sebagainya. Pemantauan berpusat yang dapat mengurus dan melalui penggunaan teknologi untuk memantau prasarana dan infrastruktur IT, untuk mengendalikan situasi dan pengesanan masa nyata dan pemberitahuan tentang kegagalan dan keraguan; di samping itu, ia juga boleh menyediakan asas untuk analisis keupayaan pengurusan, pengurusan insiden, pengurusan masalah dan pengurusan pematuhan dengan mengumpul dan menyusun data pemantauan, dan akhirnya menyedari kewujudan tinggi pusat data bertujuan.
Kelebihan:Pembinaan lebih mudah, mudah untuk mengekalkan, kawalan bersepadu dan pengurusan.
Kekurangan:Jarak penghantaran bekalan kuasa Bervoltan rendah DC ialah penurunan voltan terlalu tinggi, keupayaan anti-gangguan miskin semasa penghantaran.


2. termasuk bekalan 
Bekalan kuasa transfers merujuk kepada secara langsung daripada membawa bilik pemantauan kepada 220V JA
kemudian sambungkan bekalan kuasa DC12V di sebelah kamera, dan menyambung ke kamera dan memasang pendakap tersebut.

Kelebihan:Penghantaran voltan AC 220V sedang kehilangan rendah, dengan keupayaan anti-gangguan.
Kekurangan:Berehatlah di salah satu titik untuk memasang bekalan kuasa, pembinaan lebih menyusahkan.


3. 2002AND bekalan
Bekalan kuasa 2002AND merujuk kepada teknologi penyediaan bekalan kuasa DC ke peranti yang lain tanpa apa-apa pengubahsuaian Cat.5 Ethernet yang sedia ada infrastruktur, yang terutamanya digunakan kepada rangkaian HD digital sistem pemantauan Perkabelan.

Kelebihan:Mengurangkan kos, penggunaan fleksibiliti, selesa dan indah, cantik, single-pelabuhan kuasa maksimum sehingga 30W.
Kekurangan:keperluan kabel rangkaian, jarak penghantaran berkualiti tinggi adalah terhad, peralatan kuasa yang tidak boleh melebihi kuasa 30W.


Semoga tips sederhana ini boleh menjadi rujukan buat anda yang hendak membeli pakej kamera cctv.

Untuk anda yang ingin mendapatkan perkhidmatan dari PRO HERO CCTV. Anda boleh menghubungi seperti yang di bawah:-

0⃣1⃣0⃣2⃣6⃣3⃣0⃣0⃣5⃣0⃣


KENALI JENIS-JENIS CCTV YANG BOLEH ANDA PILIH | CCTV MURAH AMPANG | CCTV BAJET DI KUALA LUMPUR DAN SELANGOR

Artikel ini membincangkan jenis-jenis CCTV yang terdapat dipasaran anda.  Sebelum membeli kita mesti mengenali jenis CCTV supaya ketika pr...